STSecret Therapy
ST Surgical Approach

True fat repositioning means release, move, and fix.

ST’s dark-circle clinic is built around one idea: “dark circles” are not one problem. ST diagnoses the cause, releases the tear-trough ligament, repositions and fixes native orbital fat, then adds a shallow concealer-style graft only when a see-through dark circle still shows at the surface.

01

Classify the dark-circle cause

Eye bags, tear-trough grooves, hollowing, filler residue, pigmentation, and lid laxity can all look like “dark circles.” ST separates them before choosing a method.

02

Release the tear-trough ligament

If the tethered groove remains, the shadow can stay even after fat is reduced. Releasing the groove creates the space that makes true repositioning possible.

03

Preserve fat and fix it

The goal is not to empty the lower eyelid. Useful orbital fat is moved over the orbital rim and secured at multiple support points so the bag and groove are treated together.

04

Add a concealer layer only for surface darkness

Concealer-style fat grafting is a shallow micro-fat layer used after structural correction, only when a see-through dark circle still shows through thin skin. Adding material without correcting the cause can create a new revision problem.

ST's Signature Techniques

Under-eye fat repositioning, step by step.

The operation is simple to describe and delicate to perform: identify the bag and groove, release the tether, move the fat, fix it, and smooth only what still needs support.

Under-eye fat repositioning

Native orbital fat is preserved, mobilized, moved over the orbital rim, and fixed after the tear-trough ligament is released. The goal is a smoother lid-cheek transition without unnecessary fat removal.
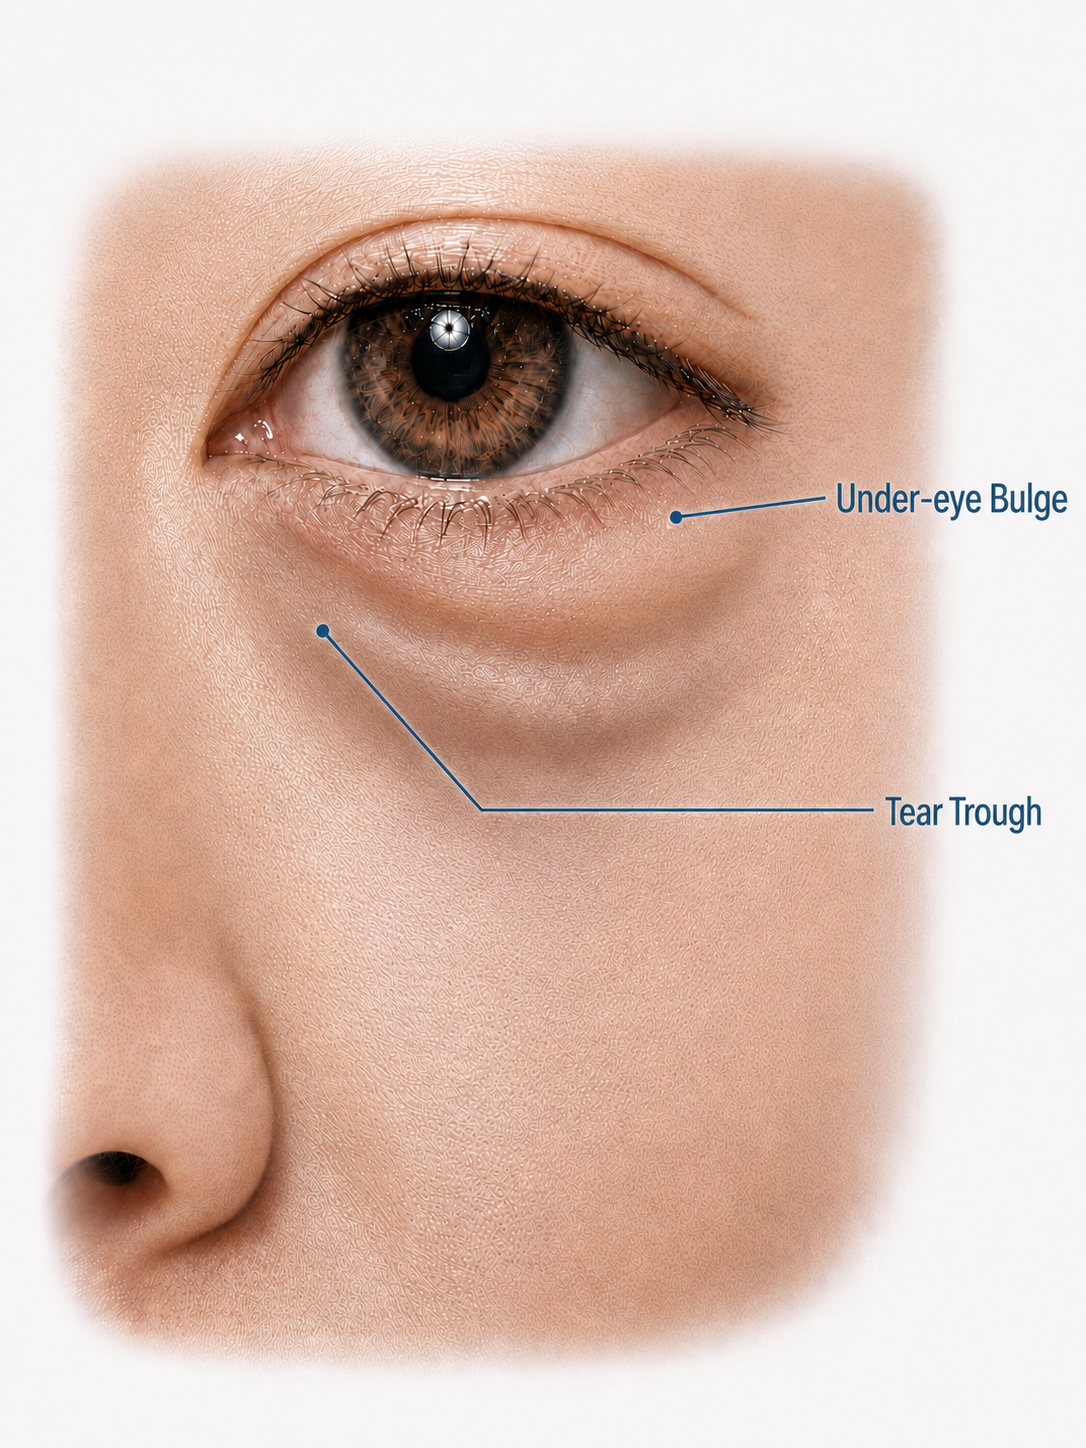
  1. Close-up of an under-eye showing the tear-trough shadow and protruding orbital fat
    Step 01

    Before

    The tear-trough groove with overlying fat protrusion — the under-eye signature that brings patients in.
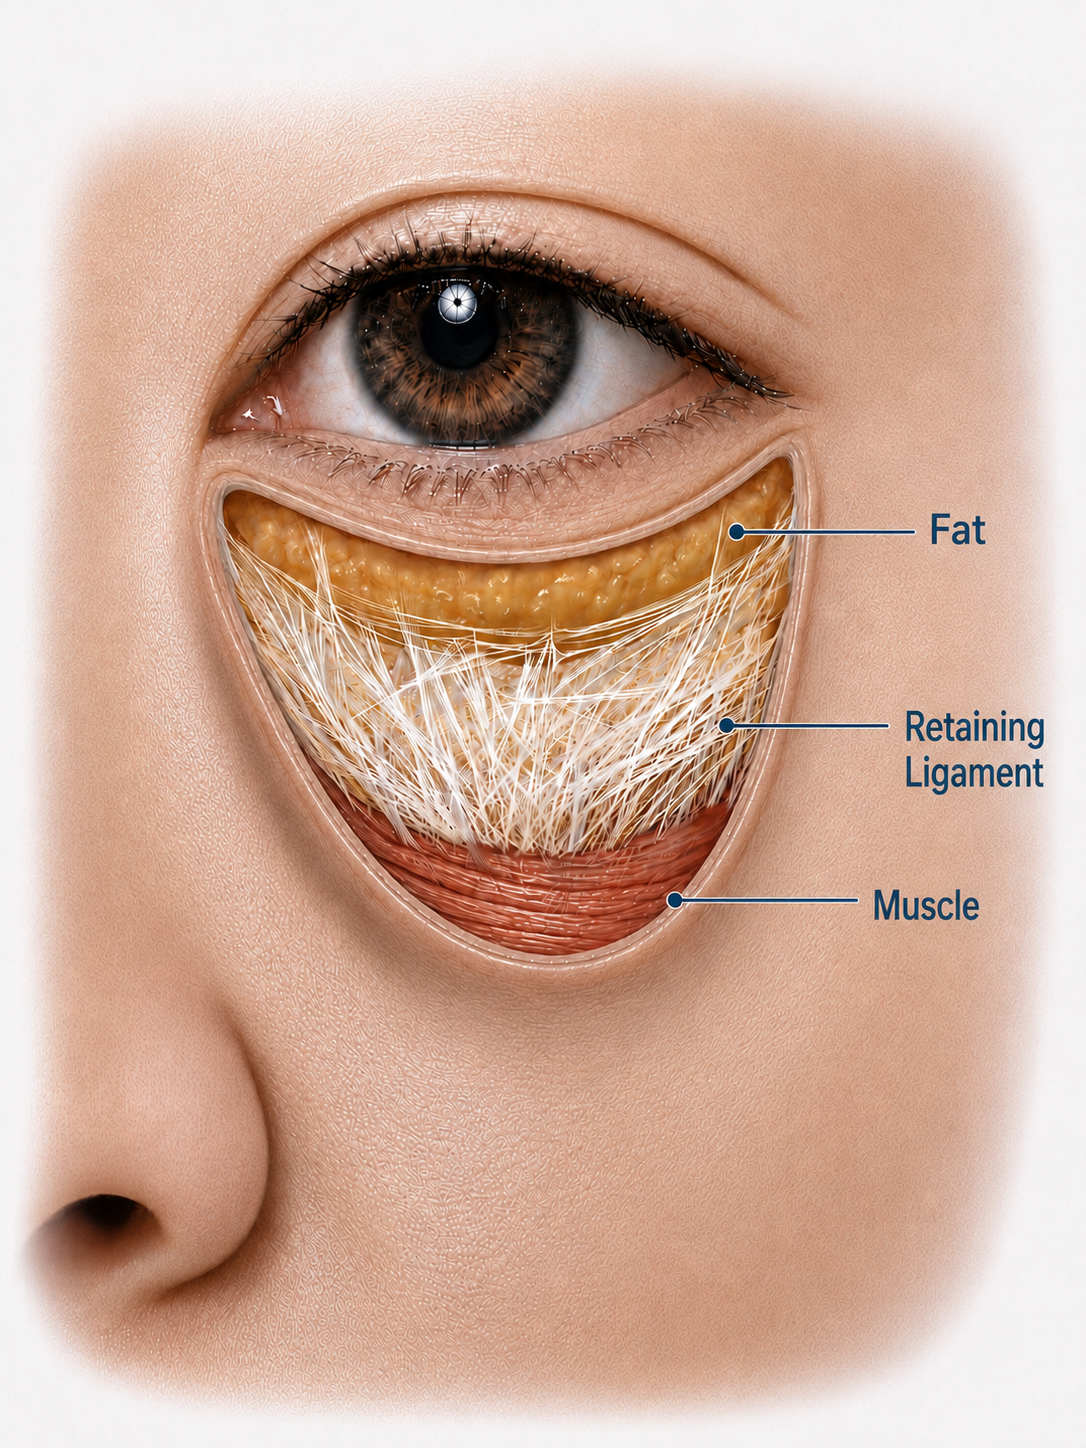
  2. Anatomical illustration revealing orbital fat lobules and the tear-trough ligament on the maxilla
    Step 02

    Anatomy revealed

    Orbital fat (yellow) sits against the tear-trough ligament — a true osteocutaneous ligament anchored on the maxilla. This is the structure that creates the groove.
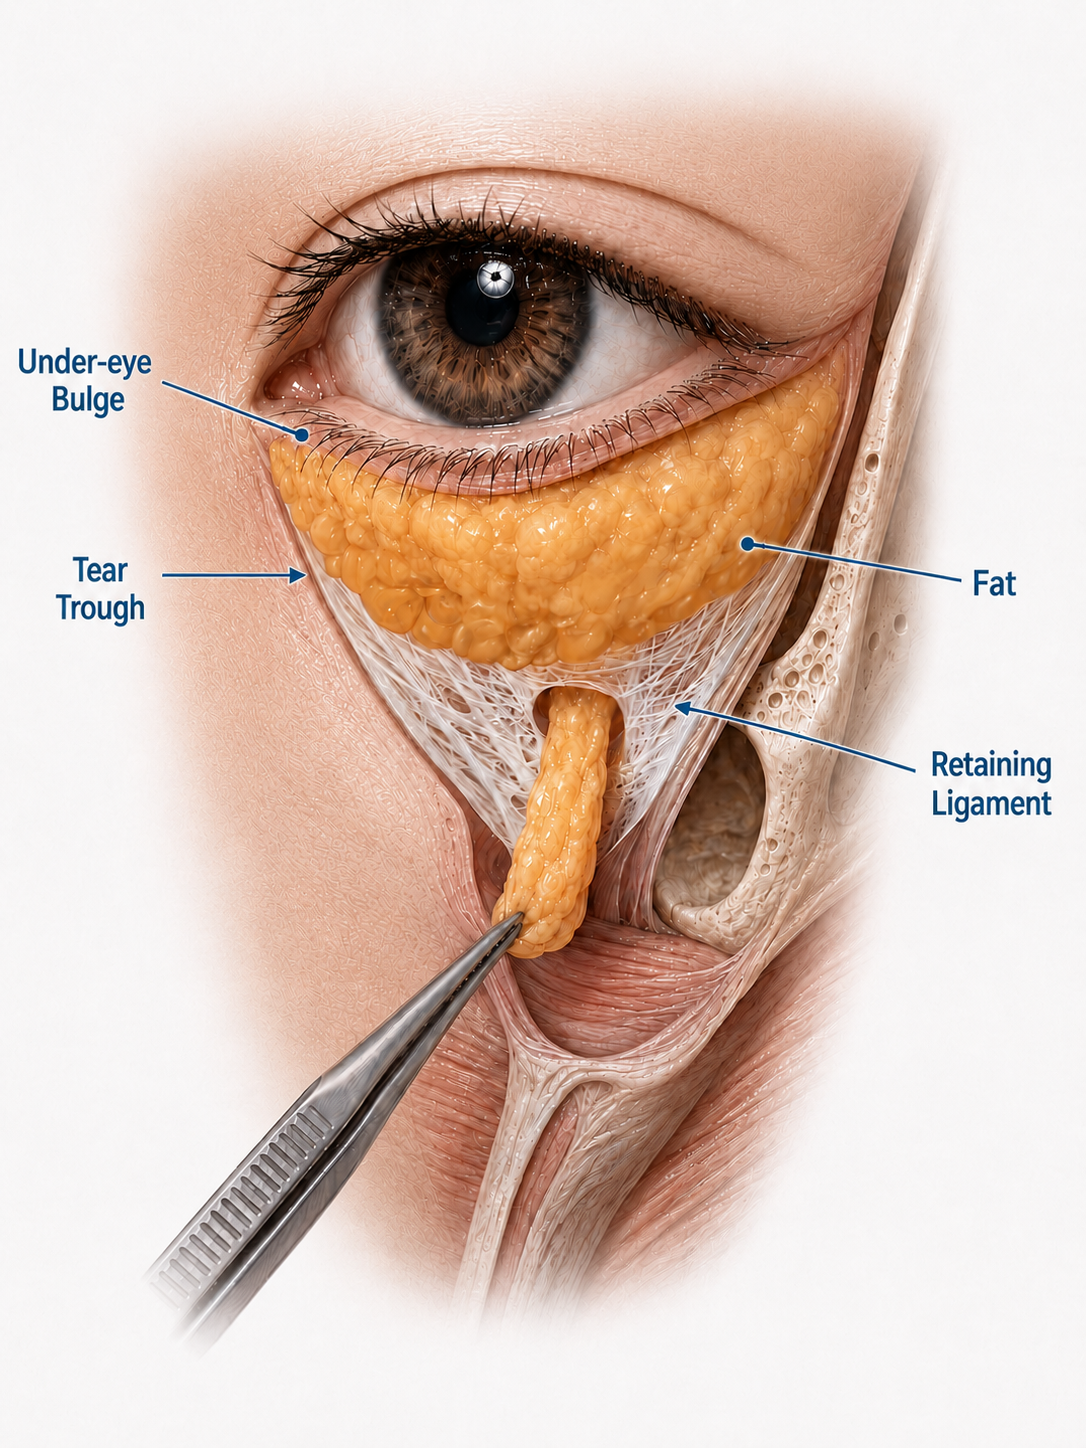
  3. Illustration of forceps mobilizing the orbital fat pedicle after ligament release
    Step 03

    Release & mobilize

    The tear-trough ligament is released — the maneuver that matters most. The orbital fat is mobilized as a pedicle, keeping its blood supply intact rather than excising tissue.
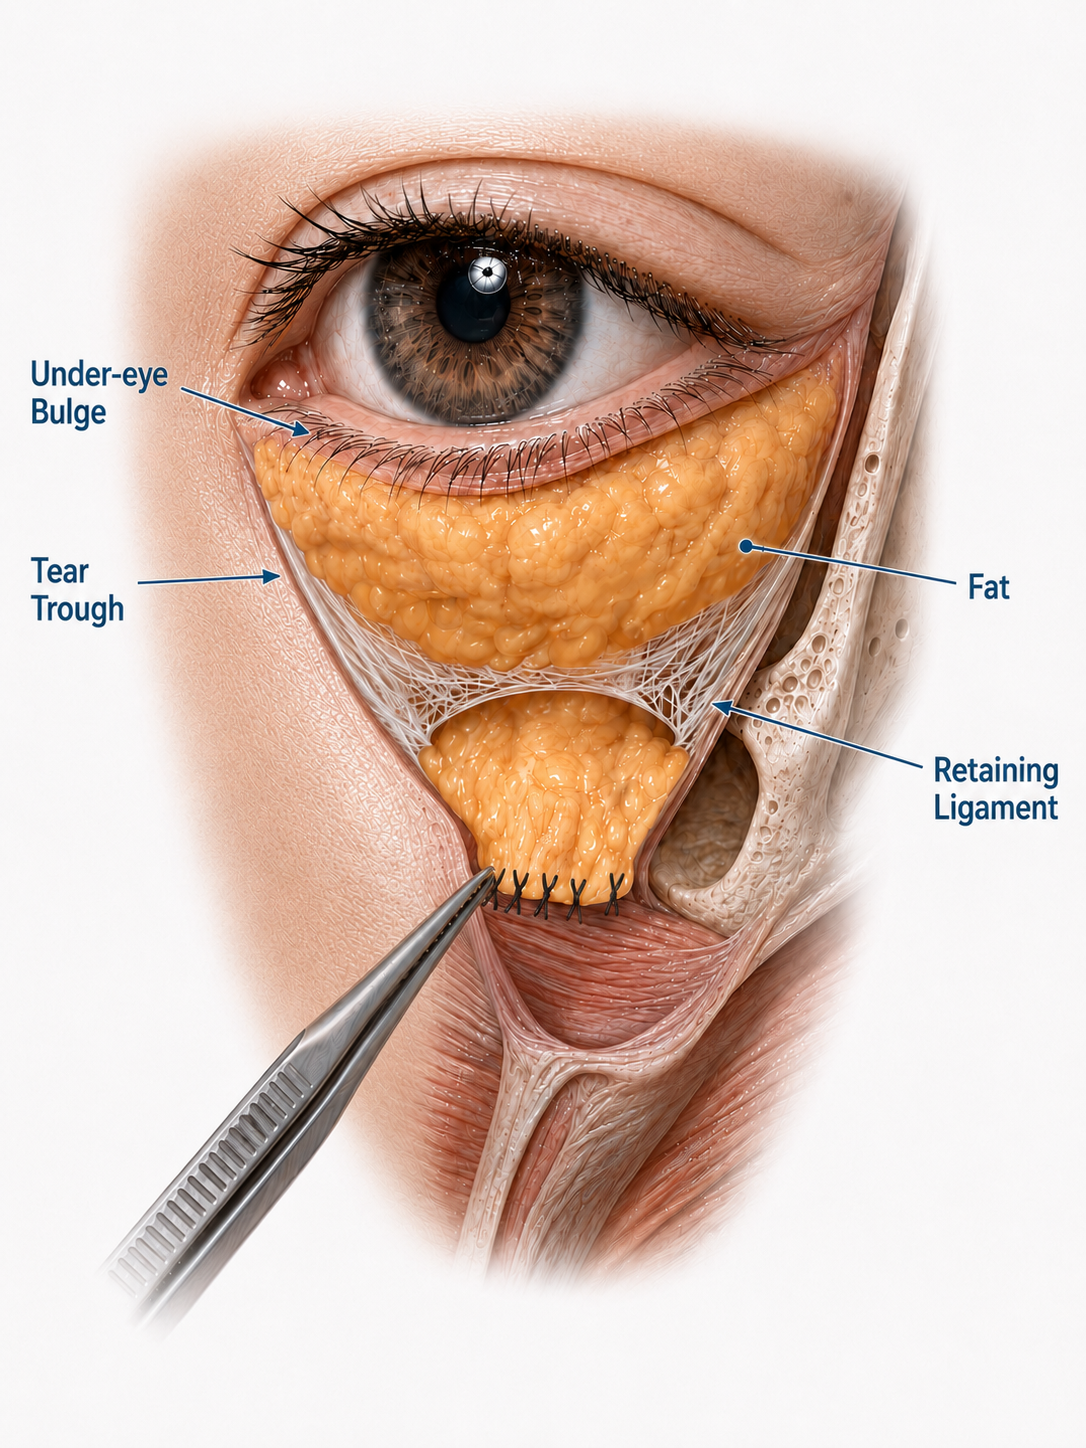
  4. Illustration showing the orbital fat secured with five suture anchors over the orbital rim
    Step 04

    Five-point fixation

    The fat is redraped over the orbital rim and secured at five anchor points, so the load is distributed and no single suture carries the weight alone.
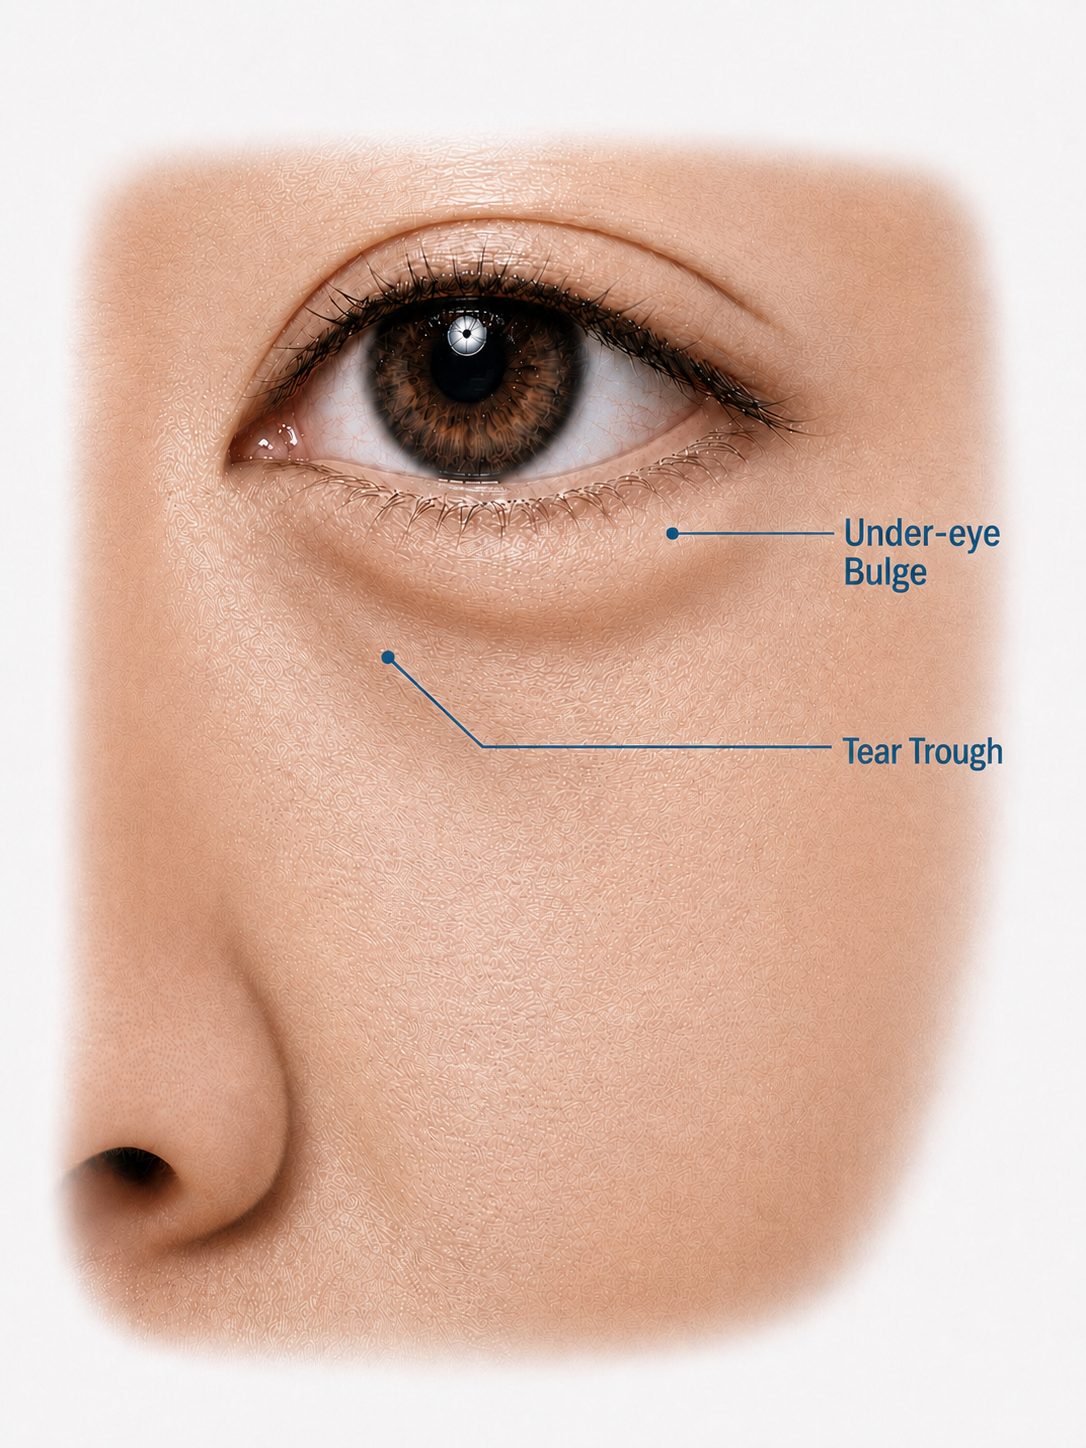
  5. Close-up of the under-eye after the procedure, showing a smoother lid-cheek contour
    Step 05

    After

    A smooth lid-cheek transition. The groove is closed and the surface stays even at rest and in expression.
Surgical Methods

Inner-lid, incision, partial incision, or support — the route follows anatomy.

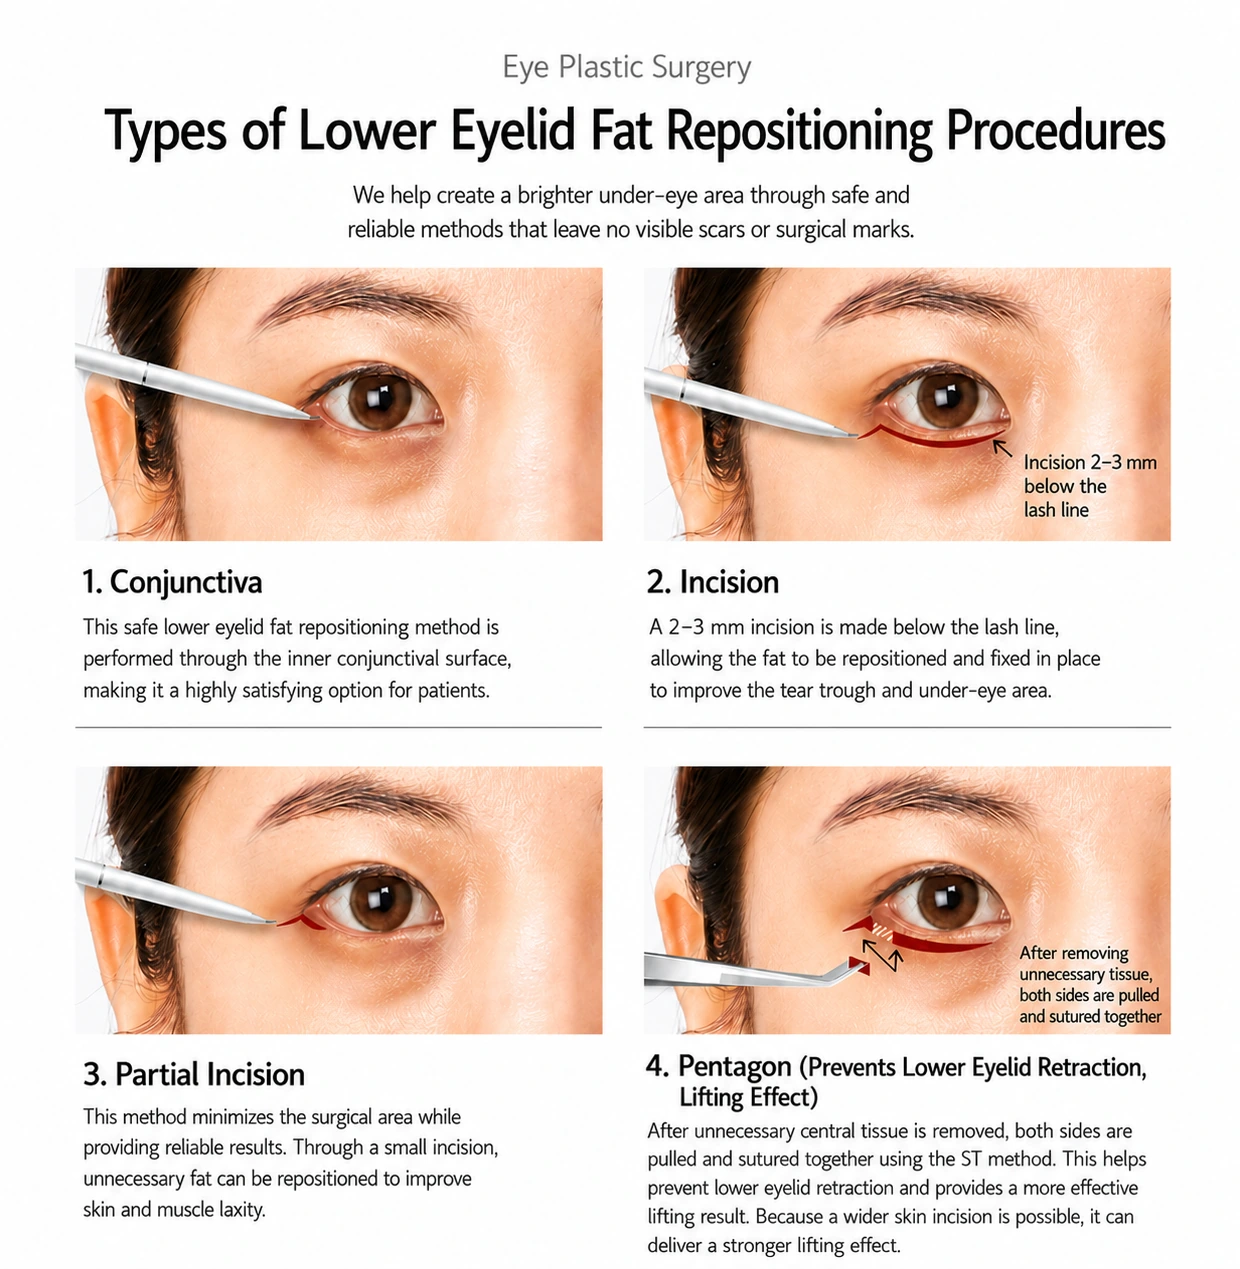
ST’s original page explains four routes: transconjunctival, incisional, partial-incision, and support-focused. The renewed site keeps the principle: choose the route by skin laxity, lid support, fat volume, and prior surgery history — not by a one-size-fits-all label.

ST’s four under-eye surgical methods — conjunctival, incisional, partial incision, and Pentagon
Concealer Fat Grafting

A concealer layer for the darkness that shows through.

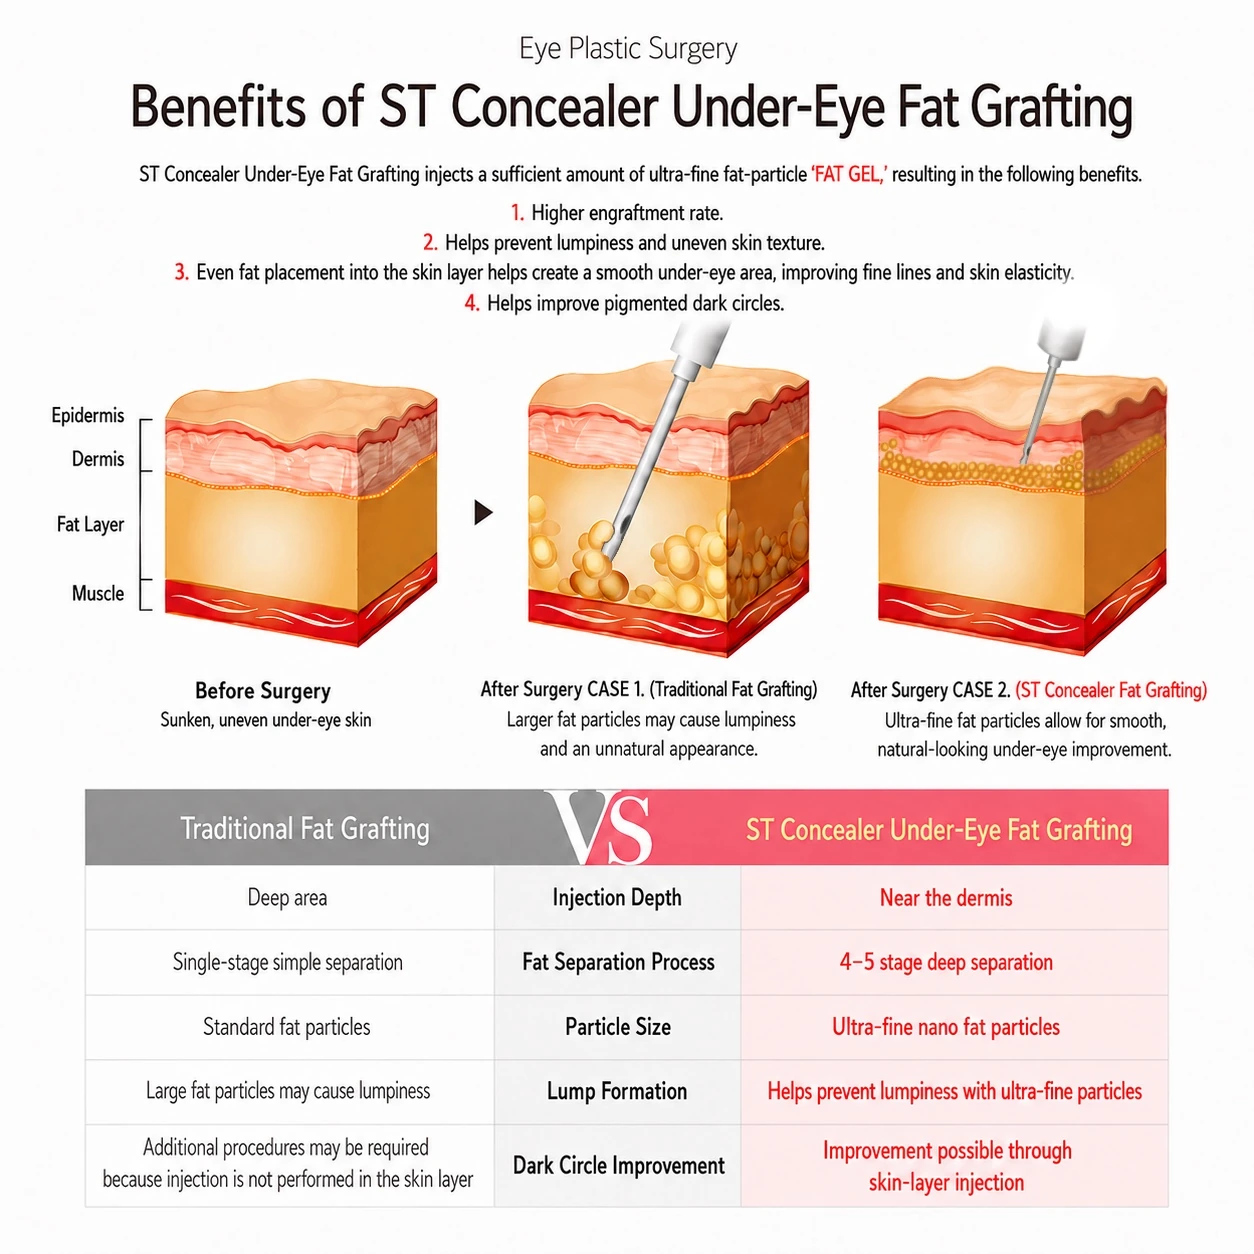
ST explains concealer fat grafting as very finely prepared fat placed in a shallow layer near the skin — to mask a see-through dark circle that remains after tear-trough release and fat repositioning. It is a surface refinement, not a deep hollow filler and not a shortcut for every dark circle.

Skin cross-section diagrams comparing a see-through under-eye dark circle, conventional deep grafting, and ST shallow concealer grafting
Dr. Kim Sang-tae reviewing a clinical chart in his white coat

Before operating again, we read the cause again.

Anatomy-Based Revision Planning

After fat repositioning, the issue is often the structure that was missed.

A remaining groove, deeper hollowing, or uneven surface after under-eye fat repositioning is not always about how much fat is left. The tear-trough ligament, the movement and fixation of orbital fat, and traces of previous filler or fat grafting must be reviewed together. Before removing or adding more, ST separates the cause of failure first.

  • We look first at why the groove remains, not only how much fat is left.
  • Tear-trough release and fat movement are planned together.
  • Prior filler or fat grafting is considered before revision planning.

Fat removal vs. ST under-eye fat repositioning

Conventional Fat Removal
The eye bag is reduced, but the tear trough may remain visible
ST Fat Repositioning
The groove is released first, then native fat is moved across the rim
Conventional Fat Removal
Filler or grafting is added to cover the shadow
ST Fat Repositioning
Material is added only after the structural cause is corrected
Conventional Fat Removal
Fat may drift or hollowing may appear after over-removal
ST Fat Repositioning
Repositioned fat is fixed so the contour holds more reliably
Conventional Fat Removal
Surface lumpiness can occur when filler or fat is placed too superficially
ST Fat Repositioning
Fine grafting is reserved for true hollows and planned to keep the surface smooth
Conventional Fat Removal
Aegyo-sal is mistaken for eye-bag fat
ST Fat Repositioning
Aegyo-sal is explained separately; repositioning is not meant to enlarge it

Considering revision? Start with an easy consultation.

You do not need to decide on surgery first. Send photos and prior procedure history, and ST will help you begin comfortably.

Book Consultation